Ultimate 28-Hour New Car Detailing – RallyWays Toyota Tacoma TRD

I recently undertook my most ambitious new car detailing project to date. It was a 28-hour detailing job on the brand new RallyWays Toyota Tacoma.
I have been studying professional detailing carefully on my own in my spare time. I have learned that brand new car detailing is as important as detailing a car that seemingly might need it more. I have friends that drive Ferraris and other super cars whose brains I have been picking to learn their secrets for car care. I have also spent countless hours reading tutorials, reviews and articles about pro auto detailing, mainly for high-end cars. There is a big difference between the instructions for off-the-shelf products at O-Reilly’s and the products and techniques used by the true car show detailing aficionados.
The great thing about this feature is that the techniques and products I used to detail this new $30,000 truck are the same procedures used to detail a $300,000 super car.
The only thing this detail did not include was paint correction and swirl-removal. The truck is brand new, and it did not sit at the dealership long enough to get washed and scratched. Additionally, I asked the dealer not to wash or detail the truck when they delivered it to me. So basically, I received it as they got it from the ship with plastics, shipping waxes and stickers all over the thing. The truck is white, which shows swirls much less than darker colors. But trust me, there weren’t any.
Let’s start with the steps for this project.
- Wash and remove shipping grime.
- Dry with a blower and microfiber towels.
- Clay bar the paint to get it ready for protection.
- Clay door jambs, windows, windshield, chrome bumpers and lamps.
- Seal the paint with a synthetic sealant for better protection.
- Layer carnauba wax over the sealant for better depth and shine.
- Vacuum and wipe down interiors.
- Protect plastics with 303 Protectant and apply water resistant guard to carpet.
- Wax door jambs.
- Remove wheels, clay them inside out and seal with Rejex.
- Seal lamps, chrome and glass with Rejex.
- Apply 303 Protectant to all plastics and rubber inside and out.
I carefully selected all the products used after many hours of research. I have already written an intro article describing all the products to be used in this project in detail. You can find the article here: Best Car Detailing Products
The process used to detail this Toyota Tacoma TRD is pretty much the same process I recommend in my Car Detailing Process page – albeit with a few adjustments to suit this particular project’s needs.
The wash
The initial wash of the truck is pretty straightforward. I use the 2-bucket method as well as 2 microfiber sponges. What I do is I first soak the truck with water to start the process of loosening the dirt while I work on mixing the solutions for the wash. Normally, I would use a quality car washing solution like Meguiar’s Ultimate Wash & Wax, which won’t strip the wax. But because I’m starting at the very beginning, with a new vehicle, I want any unknown wax off. So I wash it with Dawn dish detergent – Very good at stripping wax.
After preparing one of the buckets with the solution of Dawn soap and the other with clean fresh water for rinsing the sponges, I then “foam” the truck. Since I don’t have a foamer on hand, I simply make sure to make lots of suds and pick them up with the sponge. I then spread all these suds over the vehicle by squeezing the sponge without ever touching the paint. I sometimes go through an entire bucket doing this first.
Spreading the suds all over the car first helps loosen the dirt before you even touch the car. This goes a long way in preventing swirl marks and surface scratches when washing.
Before I start with the paint however, I wash the wheels and tires. I have a dedicated bucket, sponge, washcloth and brush for this process. And of course, the dirty water must be thrown out and NEVER used for the paint itself. I like to have the car covered in suds during the 15 minutes it takes me to clean the wheels and tires. All the while, the suds are working for me in loosening up the dirt. Note, this must be done in the shade. If you have no shade, you need to work faster and just keep water on the vehicle’s paint. No suds until you’re ready to work on it. Otherwise, the sun will dry all the suds on the paint and stain it.
After this is done I start from the top down and clean one section at a time. I always clean the sponge in the rinsing bucket before I go and pick up more clean soap. The reason I have 2 sponges for the paint is because the bottom sections of the vehicle (waist down) are usually dirtier than the top. I don’t like to use the main sponge for the bottom sections of the car, to help keep it cleaner. This does not take into account the extra sponge, wash cloth and brush that I only use for the wheels.
Having finished the wash and sprayed the truck down with a garden hose I’m almost ready to dry. Before that however, I have a neat little trick. I remove the nozzle off the hose so that I’m able to sheet water off the vehicle, top to bottom in sections. This prevents having a million water droplets on top of the car and makes drying much easier and safer. It’s safer because you have to touch the paint less.
Drying
I like to use a blower for most of the drying process. This helps me avoid touching the paint and reduce swirls. You need an electric blower for this. Don’t use a gas one. Many gas blowers exhaust right through the blower itself and will spit oils all over your car. So, electric only. A leaf blower is fine, but a dedicated heating blower is even better as it will dry much faster and better. Mine is non-heating, so I have to finish off the drying job with a pair of large and fluffy microfiber towels. The first one takes care of the bigger sections, while the second one is used for odds and ends.
Since I will be working on a full detail, I don’t want water to be coming out of the crevices as I ‘m working. So, I make sure to blow all the water I can out of the little crevices. But because I’ll be claying first, it will be pretty much completely dry by the time I’m ready to add wax.
I like to use an actual chamois, instead of microfiber for the door jams and the edges of the engine bay and trunk (tailgate in this case). I find the chamois gets really dirty, but cleans much better than the microfiber towels when you put them in the washer.
Clay Paint
It’s now time to clay the paint in order to get it ready for protection. Clay bar for cars is the best way to clean the paint and prep it for polishing. I’m sure you will ask, “But, why clay the paint if it’s a new car?” or “Should I clay bar a new car?” The answer is YES.
In fact, there’s no better time to clay the paint than when the vehicle is new and you are preparing it for protection for the next few years. Cars arrive kind of dirty from the factory. Meaning, the paint is crazy contaminated. There’s contamination from the shipping process, rail dust stuck in the paint pores and all kinds of grime from packing materials, tape and stickers.
The minute you start claying the paint, you’ll notice just how dirty it really is. In this particular case, it’s a truck that had not even been at the dealership for more than 2 weeks. Most new cars sit around much longer than that before they are bought, so they’ll obviously be worse.
I used Meguiar’s Smooth Surface Clay Kit for the job and it was satisfactory. For the clay bar lubricant, I used Meguiar’s Quik Detailer for part of the job, but also tried Chemical Guys Synthetic Quick Detailer. Both were absolutely fine for the job. However, in the future, I’d like to try a slightly more aggressive clay than the standard Meg’s stuff. No big deal though.
I had 2 bars of clay. It’s a big truck, not one of my Miatas, and I found the first bar to get quite dirty 2/3’s of the way through the job. So, I broke out the second clay bar near the end. The first bar I relegated to use for the glass, lamps, chrome bumpers, doorjambs, tailgate and hood gutters. Then I put it away to further relegate it for claying the wheels. After that, it was pretty much trash. The second bar was clean enough to see another detailing day in the future.
Prep
After claying the white truck and wiping off any excess with quick detailer I got ready to prep for paint sealant. By then, the day was coming to an end, but I wanted to at least apply the first layer of protection. Doing this today would allow me to call it a day and leave the truck in the garage to let the synthetic paint sealant cure for 12 hours.
Some guys like to wash the vehicle again after claying. I personally don’t think this is necessary unless you’re pushing the 28-hour detail up into the 30’s. Since my quick detailer has no additives, I find it to leave no residue. Otherwise, a good cleaner sprits is a good idea to get the paint ready for protection.
Inspect and polish
Before going crazy on wax, to follow my car detailing procedure, at this time I must inspect the paint closely to decide if it needs polishing or not. Most of the time, a bit of polish can go a long way, but you also don’t want to polish every time you do an extended detail job. Polishing removes paint or clearcoat, and you only have so much of that until you cut through it.
At this point, you can measure the paint thickness if you have one of those fancy paint thickness meters and decide how to proceed. The truck is new, so the paint is nice and thick. It’s white and new. Shining a strong LED light on it reveals very little to be concerned about. I decide no polish is needed so I’m skipping this step. Plus. I’m aiming at a 30-hour project at the most. Including paint correction is this project would likely make it a 40-hour ordeal. That I’m reserving for the next project. So I move on.
Paint protection
Ok, now comes the big deal in the detailing project. Also, the hardest part of the job, but the one I like the most. The RallyWays Taco is a daily driver and doesn’t get detailed every week like the garage queens. It will be washed once a month and waxed once every 2 months. It needs more protection than your average coat of carnauba can offer. Because of this, I’m applying a synthetic paint sealant instead of carnauba wax. Polymer synthetic sealants last longer and protect better than regular car wax. However, they don’t look as pretty. For that reason, this time around I’m testing the method of layering wax over sealed paint.
I had planned to span this project over Saturday and Sunday and then finish it off working Monday night. Unfortunately, Sunday brought a little bit of rain, so I had to work most of the time inside a tiny garage. This slowed me down quite a bit. Needless to say, the project wasn’t completed until Wednesday evening.
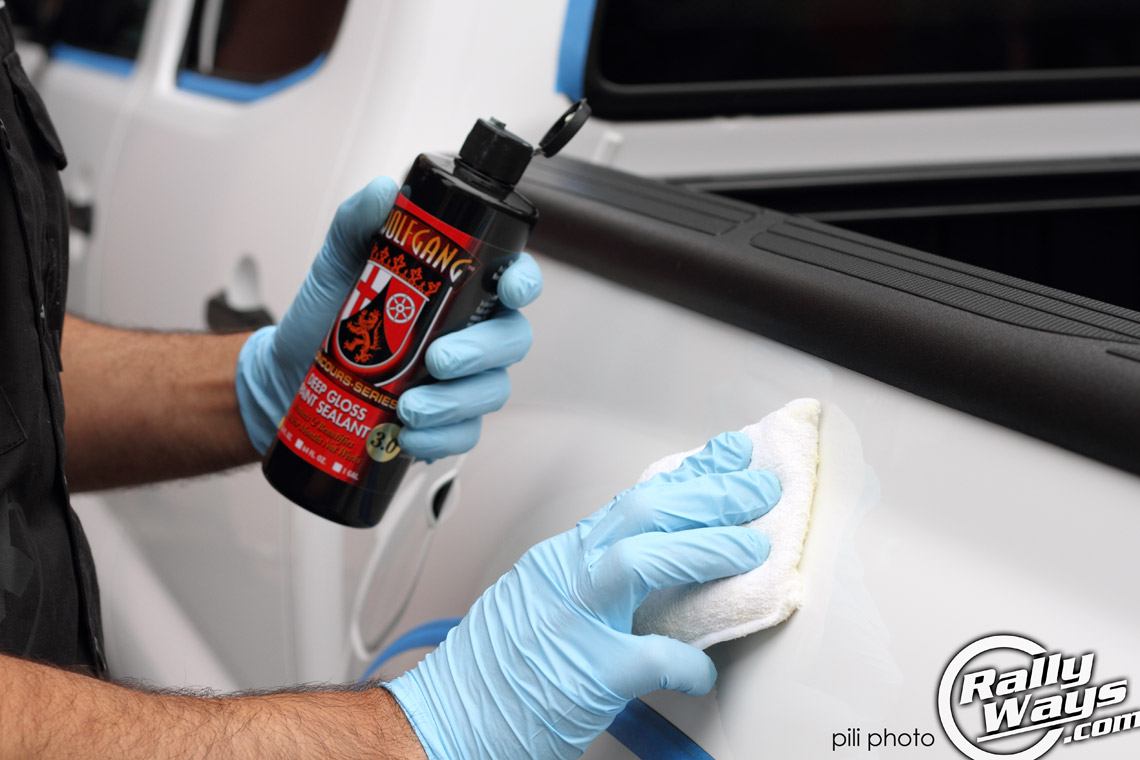
My choice of paint sealant for the job was Wolfgang Deep Gloss Paint Sealant 3.0 at $40 for the 16oz bottle. Before applying the sealant, or any wax for that matter, I mask off plastic trim that can easily get contaminated with wax using 3M blue painter’s tape. This goes a long way in keeping black trim looking black.
Some of the black trim I can avoid touching just by being careful. However, awkward locations should be masked. If you are applying wax using an orbital buffer, you should go berserk on the painter’s tape. Orbital buffers speed up the job and add ease, but they are much harder to keep off the black trim than a hand applicator.
By the time I’m applying the Wolfgang sealer it’s nearly dark so I break out my powerful halogen work lamps to help me out. I apply the sealant in long lines, as the air would flow over the truck, not in a circular fashion. I’m applying it by hand using some rather nice applicators I ordered from the Zaino website a few months back.
I work on a section at a time noticing it takes about 10 minutes before I can buff out the residue paint sealant from the panel I’m working on using microfiber towels. The microfiber towels I’m using, I fold twice. This gives me 8 fresh surfaces to work with. As the towel gets saturated with wax residue, I flip over, unfold a section, so on and so forth until I have used all 8 clean surfaces. Then I switch to another towel.
After I have done the whole truck, I call it a night. Lights off and I let the sealant cure overnight.
Interior
Early Sunday morning I decide to work on the interior before I continue with the paint protection. It’s usually a good idea to work on the interior between wax coats to allow it to cure. I figured it would give me the opportunity to go to church after I’m finished sorting out the interior. After all, it’s Sunday. When I get back I can continue with the wax layering.
The truck is of course only a few weeks old, so a bit of vacuuming and dusting is all that is needed for cleanliness. I used one of those cool Dyson Ball vacuum cleaners. Turns out they work for cars too. But, it’s also obvious they were designed mostly for home carpets and using the attachments and hose for a car could have been a little less unwieldy with a different setup. Vacuuming done, the tricky part was the stain proofing and protection…
For protection I used 303 Aerospace Protectant on all plastics and vinyls. I love 303 Protectant because it adds depth to plastics but the result is a clean satin finish. There is no gloss or sticky shiny residue like with other products. Honestly, nothing looks as cheesy as overly shiny and sticky interiors.
I also proceeded to spray the floor mats with 303 Fabric Guard as well as the carpet itself. That was a bit of an ordeal. Not with the mats, as those I did outside. The problem was the carpet. I did not want to get that stuff on anything other than the carpet. Using a piece of carton I cut from a shipping box I had to play contortionist to mask off areas I did not want contaminated before I could spray. Because 303 Fabric Guard is not an aerosol, it sprays quite a lot more “wet” and takes forever to dry too. It took about 2 days for the stuff to cure completely.
Microfiber rags for the interior windows with an ammonia-free window cleaner finish off the interior work. I haven’t decided what I’m going to do about the seats just yet. I’m afraid he 303 Fabric Guard is just too wet and sticky for the seats. I’m afraid it might darken the fabric too. Since Toyota claims they come protected from factory, I’ll just leave them as is for now. Maybe in a year I’ll consider what to do about protection.


Wax layering
Layering wax is something that is very popular on supercars, garage queens and show cars… not trucks. But the RallyWays Taco is the canvas today and I decided I was going to layer waxes on it. Like I said earlier, synthetic paint sealants tend to protect better and last longer, but they don’t shine as much as carnauba wax.
The plan then is to apply 2 layers of wax over the synthetic sealant. This will be done in hopes to deepen the shine and to extend the protection even further. The end result would come after 2 thin coats of wax spaced by 12+ hour curing periods. This would yield 3 layers – The sealant, and the 2 coats of wax.
For the wax I chose Collinite 845 for reasons you can read about in that article. The wax went on easy and smooth. I’m layering it on an already slick and protected surface so it goes on even more smoothly. Collinite 845 is very easy to apply. Removing it is not as easy as other waxes, but also not too tough. I applied the car wax in the same fashion I did with the Wolfgang 3.0 paint sealant. Again I use a Zaino applicator pad and remove the residue with a microfiber towel. I did notice I had to wait a little longer for the Collinite 845 to haze over in comparison with the Wolfgang paint sealant.
This was all done on Sunday. But it wasn’t until Monday night that I was applying the second coat of wax. Still Tuesday night there were sections I had to cover.
Sealing and protecting further
This a VERY intensive detailing job. No rock is left unturned. Between coats of wax I had to wait 12 hours at least for each coat to cure. During that time, I got busy with other things. I decided to leave the wheels to the end simply because those were going to be a pain in the arse to do.
While I waited for the Collinite 845 to cure I treated the glass, chrome bumpers, headlights, tail lamps and all external plastic and rubber trim. The plastic and rubber trim was easy. I simply sprayed 303 Protectact on a clean microfiber cloth and carefully applied it. Carefully, because I could not get any on the paint. I treated the top edges of the bed liner, the plastic trim below the front bumper, the black rear view mirror housings and anything else I could find that was plastic or rubber. I love how the 303 Protectant makes the blacks deeper, yet not tacky and shiny. This stuff is quickly becoming one of my very favorite chemicals. I might even make a strawberry smoothie out of it. 303 strawberry smoothie. With bananas.
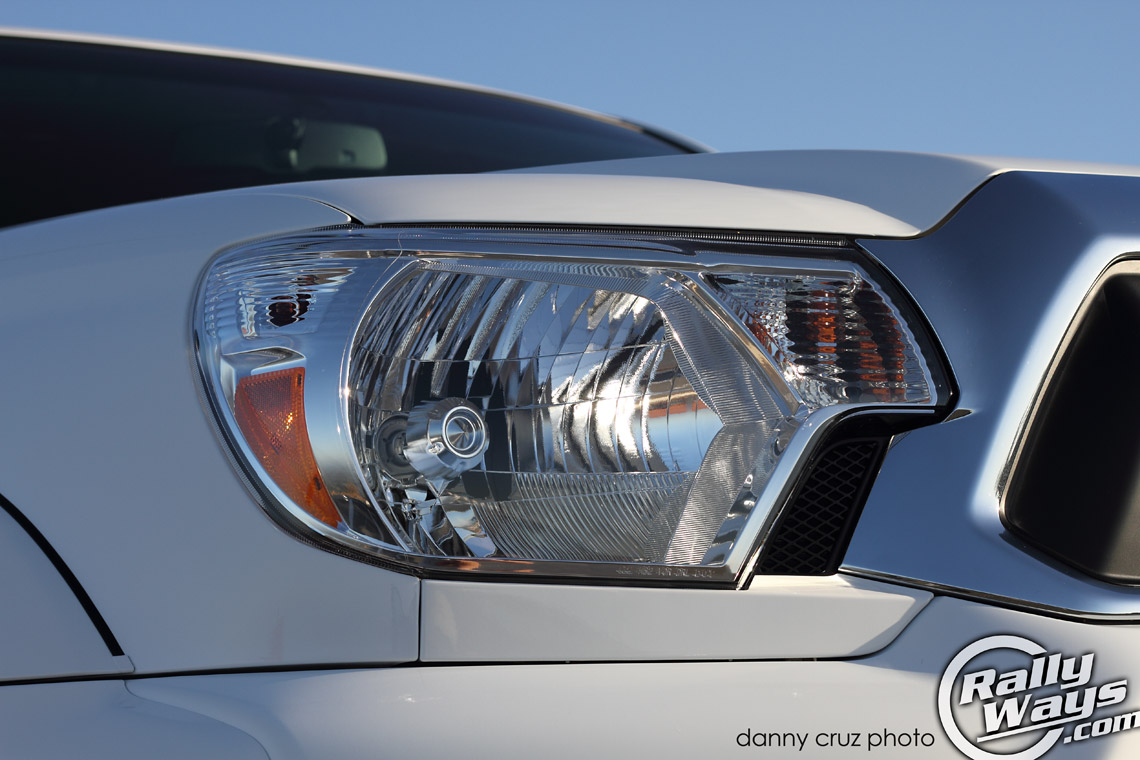
Next up was treating the glass, headlights, taillights and chrome bumpers with my other secret weapon, Rejex. While Rejex is also great as a paint sealant, for this project it’s only tackling the job of keeping the glass slick as well as other areas that will not be protected with actual wax. It’s great on painted bumpers and on headlights because it’s helps to keep bugs from sticking to the surfaces.
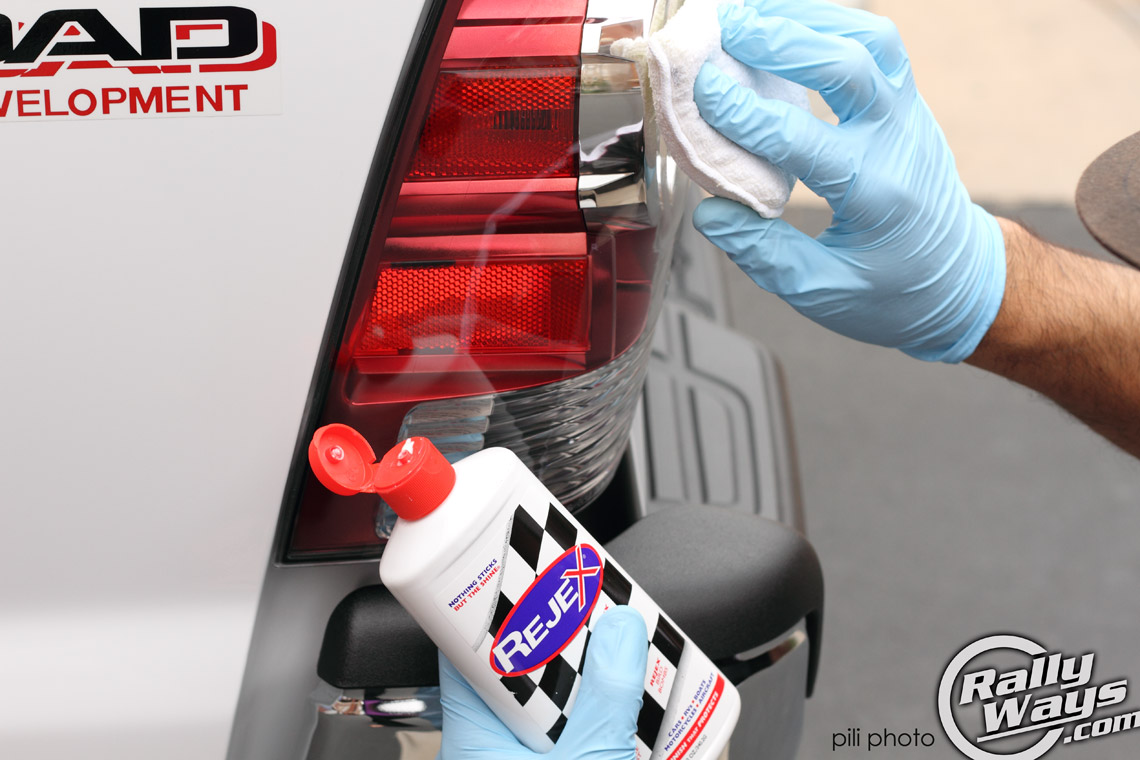
The rear bumper in the TRD Offroad Tacoma is chrome. That got a coat of Rejex as well.
Detailed detailing
Between layering waxes I also took the time to apply paint sealant to the doorjambs. I figured I could wax them too, but because this is a rather protected area that is not under direct sunlight I decided a single coat of sealant would be more than enough. It should also last a very long time.
Keep in mind I had previously completely cleaned and clayed the door jambs… all the way to the front hinges. You know those hinges that always look awful and grungy in most cars? Well, those. They are perfectly clean and shiny on my truck.
Other small details included applying 303 Protectant to all the weather-stripping, and the mud flaps. Although the mud flaps are coming off soon. They look silly.
I took some time to work on the engine bay as well. Everything in there was clean, but I pulled out a bit of dust here and there. Of course, I also protected all the plastic and rubber bits with my favorite… 303 Protectant.
The wheel-wells were wiped down, the exhaust was cleaned and the wide bottom edge of the fenders, which are painted, was also sealed and waxed. Even the crevices around the gas cap cover were cleaned. The front plastic chrome grille was Rejexed. That one turned out awesome by the way.


The last bits
By Tuesday night I was able to apply the last coat of Collinite 845. By then, the paint was very deep and much more glossy than with paint sealant alone. The last bit to still deal with was the wheels. Those were a little tricky because I had to take them off. There’s no way to really get in there to clean and protect without taking them off. The nice thing is, once they have been cleaned and treated, keeping them clean is a lot easier.
I did one end at a time. First I jacked up the rear end, put it on jack stands and removed both back wheels. I washed them again inside out to make sure they were perfectly clean. I cleaned the tires with a diluted solution of Simple Green and brushed them until my right arm fell off. Once clean, I dried them with the blower.
I then clayed the wheels inside and out with that relegated bit of clay bar I had used near the beginning of this project. That pretty much rendered the clay bar completely useless. Using that clay bar on the wheels turned it into light grey play-dough.
The tires themselves got a coat of 303 Protectant. The wheels were coated inside out with Rejex. I’ve heard Rejex is really good on wheels and helps keep them clean by not allowing brake dust and other crap to stick to them. So far, it’s been going great.
After I was done with the back wheels, I put them back on, torqued the lug nuts with my handy “el-cheapo” Harbor Freight 1/2″ torque wrench and proceeded to repeat the process in the front. That was Tuesday night.
Wrapping up
Come Wednesday late afternoon I was sore and tired but pretty much done. By then it was just a matter of inspecting the work in sunlight and finding bits of wax here and there to clean off. I cleaned off a few fingerprints on the glass and paint. I made sure there was no residue on the wheels or anywhere else for that matter. Put the floor mats back in. Those were drying in the garage. Then shot some of the photos you see here. The bright ones were shot early in the morning the following day.
This was one very intensive detail job. It’s one of those projects that based on the quality of the products used and the time and attention to detail spent, you would be paying over a grand to have a pro do it. For this reason, it’s not for the faint of heart – whether you are doing it yourself, or paying someone to do it. This project is way beyond the “executive” car detail you would pay $595.00 for at a gas station detail shop. I’ve seen plenty of those. No, this project is way beyond that.
In the end, unless you have a Lamborghini or a Ferrari you’re probably wondering why you would do this sort of thing on a daily driver if it’s only going to get dirty again soon. Well first of all, it was an exercise in applying most of the knowledge of car detailing I have been gathering through the years in a “hold nothing back” approach. Secondly, while it might be getting dirty again soon, there’s no denying it will stay cleaner longer. It will also be protected and make for easier washes in the near future.
Bugs can be easily wiped off the paint with a bit of quick detailer instead of having them engraved in the paint. I know, because a week after I had finished this project I drove through a swarm of at least 2,000 bees at 60 mph splattering them all over the front end of the truck. An hour later I was very easily cleaning them off with quick detailer like nothing happened.
A full month later, the truck is yet to be washed again, it’s gone through 3 rainstorms and it still looks clean. Nothing sticks to it. The work was totally worth it.
This project took 28 hours to complete. The next project will be on a garage queen and will include paint correction and more coats of wax. That one I estimate at 40 hours. Good thing is, as a garage queen, I can take longer than 3 days and not worry about it being out of commission longer than that. On the truck I couldn’t go longer than that because we needed to use it.
What do you think? Would you consider tackling a project like this yourself or would you pay the hefty amount of cash for someone else to do it? Which car?

![What is Car Detailing? [Answer]](https://rallyways.com/wp-content/uploads/2012/02/detailed_mx5.jpg 1140w, https://rallyways.com/wp-content/uploads/2012/02/detailed_mx5-360x240.jpg 360w, https://rallyways.com/wp-content/uploads/2012/02/detailed_mx5-330x220.jpg 330w, https://rallyways.com/wp-content/uploads/2012/02/detailed_mx5-750x500.jpg 750w)


